
Fence Installation Timeline in Oregon, IL: What to Expect During a Fall Project
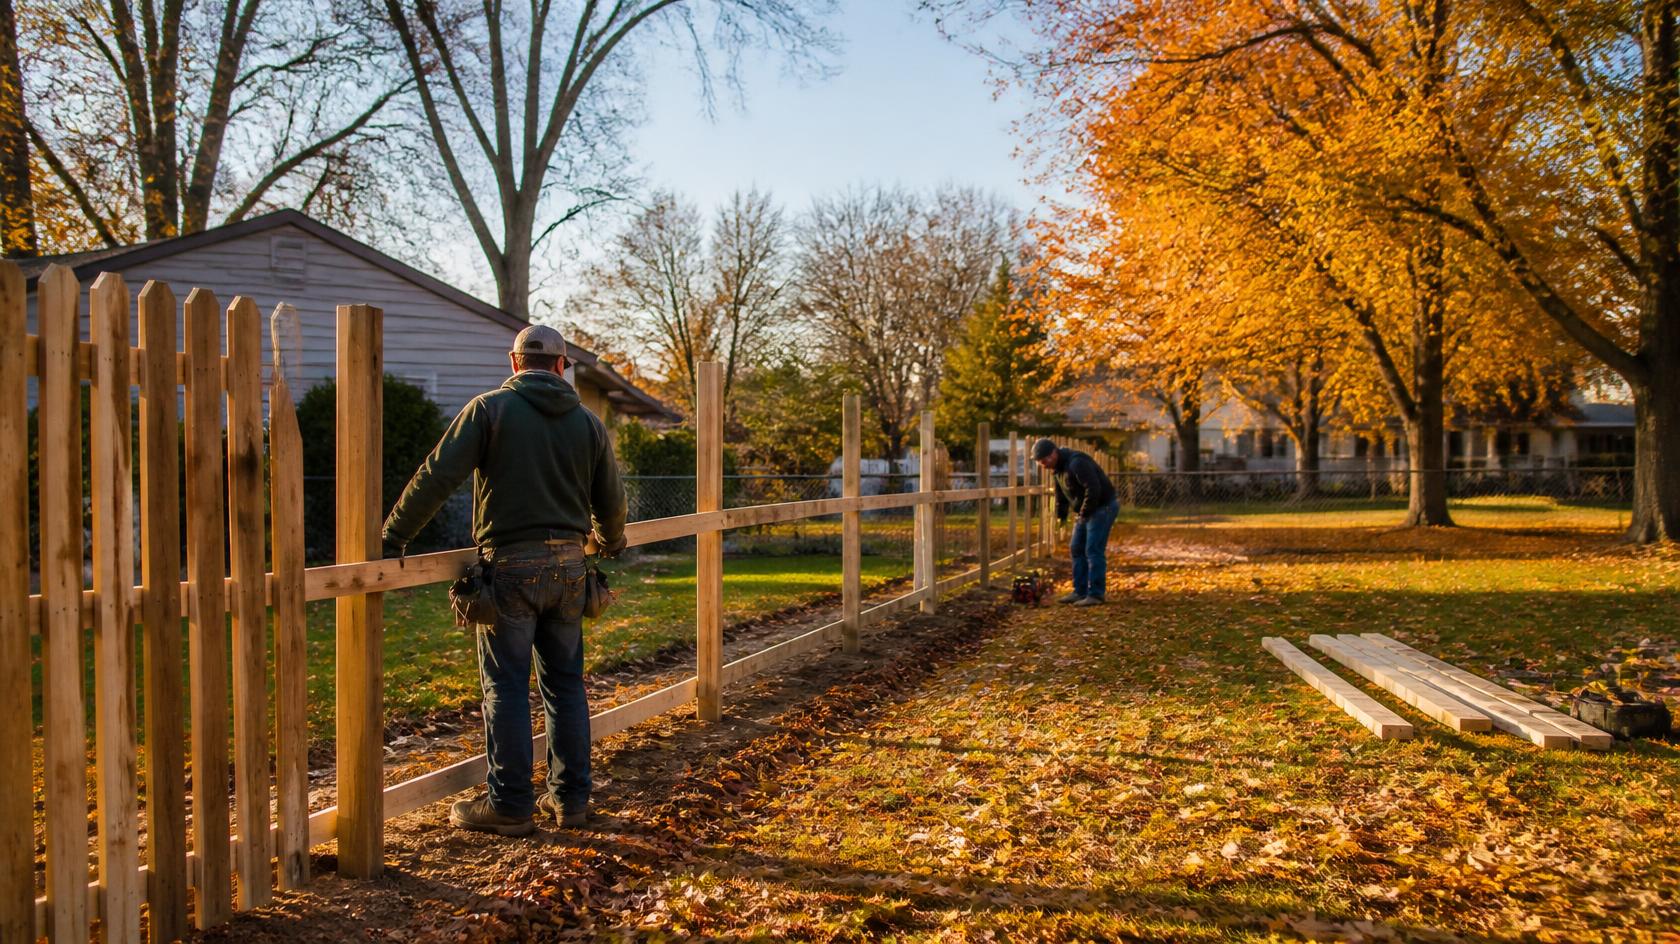
A fall fence installation in Oregon, IL usually includes planning, material selection, property review, site preparation, post installation, fence assembly, gates, and final cleanup. The exact timeline depends on fence length, material, yard access, existing fence removal, slopes, weather, and ground conditions, so homeowners should focus on the full process rather than expecting every project to follow the same schedule.
Why Fall Fence Projects Need Careful Timing
Fall can be a practical season for fence installation in Oregon, especially for homeowners who want a project completed before winter.
However, the season also brings changing conditions such as:
Shorter daylight hours
Cooler temperatures
Rain
Wet soil
Falling leaves
Stronger wind
Approaching frozen ground
These factors do not automatically prevent installation, but they can affect scheduling and site conditions.
That is why a fall fence project should begin with clear planning.
Step 1: Decide What the Fence Needs to Do
The first stage is determining the purpose of the fence.
Common goals include:
Backyard privacy
Pet containment
Property definition
Side-yard screening
Outdoor living privacy
Garden protection
Improved access with new gates
The purpose influences material, height, layout, and gate placement.
A privacy fence project may require a different design than an open fence used mainly for pets or property definition.
Step 2: Compare Fence Materials
Material selection happens early because it affects both design and installation.
Wood
Wood offers natural character, strong privacy, and flexible design options.
Homeowners may consider:
Solid vertical boards
Board-on-board
Shadowbox
Horizontal styles
Wood usually requires more future maintenance than vinyl or aluminum.
Vinyl
Vinyl is useful for homeowners who want:
Full privacy
Consistent appearance
Lower routine surface maintenance
It does not require regular staining or painting.
Chain Link
Chain link can be practical for:
Pets
Larger yards
Long boundaries
Side-yard enclosures
It provides airflow and visibility.
Aluminum
Aluminum can work well where homeowners want an open, decorative fence around landscaped areas or residential boundaries.
Step 3: Review the Property Layout
Before installation begins, the fence line should be planned carefully.
Important details may include:
Property boundaries
Existing fences
Gates
Driveways
Trees
Landscaping
Slopes
Drainage
Sheds
Patios
Utility areas
It is easier to adjust the layout during planning than after posts have already been installed.
Step 4: Confirm Gate Locations
Gate planning should happen before the fence layout is finalized.
Homeowners should think about how they move through the yard every day.
Possible gate locations include:
Side yards
Driveway access points
Patio areas
Pet areas
Garden entrances
Also decide whether you need:
A standard walk gate
A wider mower gate
Double-gate access
Separate equipment access
Measure riding mowers, trailers, landscaping equipment, or other large items before choosing the gate width.
Step 5: Evaluate Slopes and Ground Conditions
Oregon properties are not always perfectly flat.
Sloped or uneven yards can require additional planning.
Depending on the fence system, sections may be:
Stepped
Installed to follow the grade more closely
Ground conditions also matter.
Wet or soft soil may affect site preparation and post work.
Pet owners should pay close attention to slopes because poorly planned transitions can create large openings beneath the fence.
Step 6: Check Drainage Before Work Starts
Drainage should be reviewed before posts are installed.
Look for:
Standing water
Low areas
Erosion
Downspout discharge
Runoff paths
Soft soil
Heavy fall rain can make drainage problems easier to notice.
If water regularly collects along the proposed fence line, that should be addressed during planning rather than discovered after installation.
Step 7: Prepare the Work Area
Before installation day, clear the fence line as much as possible.
Move:
Outdoor furniture
Toys
Garden hoses
Planters
Stored equipment
Temporary decorations
Trim vines, shrubs, or low branches that block access.
A clear work area helps make the installation process more efficient and allows the crew to see the actual ground conditions.
Step 8: Remove the Existing Fence if Needed
Replacement projects may require removal before the new fence begins.
This can include:
Old panels
Boards
Posts
Gates
Hardware
Concrete footings
The amount of time required depends on the condition of the old fence.
Ask whether removal, hauling, disposal, and cleanup are included in the project scope.
Step 9: Mark and Prepare the Fence Line
Once the site is ready, the planned fence line can be laid out.
This helps establish:
Post locations
Corners
Gate openings
Changes in direction
Transitions along slopes
This stage is important because the rest of the installation depends on accurate spacing and alignment.
Step 10: Install the Fence Posts
Posts are one of the most important structural parts of the fence.
They support:
Rails
Panels
Boards
Gates
Post installation may require different preparation depending on the fence material and soil conditions.
Gate posts and corner posts deserve particular attention because they often carry more stress than ordinary line posts.
Step 11: Allow for Material-Specific Installation
The next stage depends heavily on the material.
Wood
Rails and individual boards may be installed after the posts are set.
Vinyl
Manufactured rails and panels are fitted between posts.
Chain Link
Framework is installed before mesh is tensioned and attached.
Aluminum
Preassembled or manufactured sections are installed between posts.
The complexity of the design affects how quickly this stage progresses.
Step 12: Install and Adjust Gates
Gates are usually one of the final major installation steps.
They need:
Stable posts
Proper alignment
Strong hinges
Reliable latches
Appropriate ground clearance
The gate should open and close smoothly without dragging or requiring force.
Wider gates may require additional reinforcement.
What Can Affect the Installation Timeline?
Several factors can change how quickly a project moves.
Fence Length
Longer fence lines require more posts, panels, rails, and installation work.
Material
Some materials involve more individual components than others.
Gates
Multiple or wider gates increase installation complexity.
Existing Fence Removal
Demolition and disposal add another project stage.
Yard Access
Narrow side yards or limited access can make material movement slower.
Slopes
Uneven terrain may require more detailed layout work.
Landscaping
Dense shrubs, roots, or structures can make the fence line more difficult to access.
Weather
Rain, wind, snow, or unsuitable ground conditions may affect work.
How Fall Weather Can Change the Schedule
Fall weather in northern Illinois can change quickly.
Possible delays may come from:
Heavy rain
Saturated soil
Strong wind
Early snow
Frozen ground
A short weather delay is different from a project problem.
Homeowners should ask how weather-related schedule changes are communicated before booking.
Shorter Days Matter Too
Fall projects have fewer daylight hours than summer projects.
This can affect how much work can safely be completed each day.
It is another reason why homeowners should avoid assuming that a certain number of fence sections will always be completed daily.
Every property has different conditions.
Material Availability Can Affect Start Dates
Scheduling may also depend on whether the selected material, style, or components are available.
Special items may include:
Specific vinyl styles
Decorative components
Custom gates
Certain hardware
Choosing the final design early can help reduce last-minute changes.
Should You Change the Yard Layout During Installation?
Major changes are best made before installation begins.
Last-minute changes to:
Gate locations
Fence height
Material
Fence line
Equipment access
may affect the project scope.
Take time during planning to confirm how the yard will be used.
Keep Pets Secure During the Project
Homeowners with dogs should plan for temporary containment while sections of the yard are open.
During installation:
Keep pets away from active work areas
Do not assume temporary openings are secure
Check new gates before allowing pets to use the yard
This is especially important during replacement projects when the old fence is removed before the new system is complete.
What Happens at the End of the Project?
Before considering the project complete, homeowners should walk the fence line and review:
Posts
Panels or boards
Gates
Latches
Ground gaps
Corners
Transitions
Also confirm that the work area has been cleaned and that removed materials are handled according to the agreed scope.
Ask About Maintenance Before the Crew Leaves
The final stage is understanding how to care for the new fence.
Ask about:
Cleaning
Gate adjustments
Hardware inspections
Wood finishing
Seasonal checks
Winter care
Different materials require different maintenance.
Knowing what to watch for can help keep the fence functioning properly through its first winter.
Questions to Ask Before Scheduling a Fall Project
Before booking, homeowners may want to ask:
What steps are included in the installation?
Is old fence removal included?
What site preparation is needed?
How are slopes handled?
How are drainage concerns addressed?
What gate sizes are included?
What could affect the schedule?
How are weather delays handled?
Is cleanup included?
What maintenance is recommended after installation?
Clear answers help set realistic expectations.
Plan Before Frozen Ground Arrives
Fall installation can work well when the project is planned early enough and site conditions cooperate.
Waiting until winter is very close may leave less flexibility for:
Weather delays
Material availability
Site preparation
Existing fence removal
If a fence is a fall priority, starting the planning process sooner can make scheduling easier.
Request a Free Fence Installation Estimate
Arrow Fence helps Oregon homeowners plan fall fencing projects for privacy, pets, backyard use, gates, and property boundaries.
Whether you are considering wood, vinyl, chain link, aluminum, fence replacement, repairs, or a completely new installation, Arrow Fence can help you review the project steps and practical options for your yard.
Contact Arrow Fence at arrowfencerockford.com to request a free estimate for your fence installation project.
